New kid on the block in Boulder is Ripple Frozen Yogurt and boy did they figure out the right mixture for success.  When first walking into the store we were a little overwhelmed, but luckily Drew and I were greeted by the owner that showed us how to Ripple.  One wall of the store is taken over by different flavored frozen yogurts and then there is a never ending toppings bar!  The first time Drew and I went to Ripple was to meet my awesome future roommate and her boyfriend, Hayley and Jason; we tasted every flavor for about twenty minutes before we could make a decision.  Oh my gosh, this place is awesome!

The flavor combinations are endless, and in my opinion you can never go wrong.  I usually go for one of two things and add a little variation each time.  If you want fruity, I suggest trying the tart and raspberry lemonade sherbet  with all sorts of fresh fruit toppings OR even better is peanut butter mixed with cookies and cream.  I will top the second mixture with marshmallow cream, MUDDIE BUDDIES!, Oreo pieces, and then top it off with a few miniature gummy bears!  Yumm’O!  Drew goes more funky with his flavor combinations, but they always seems to work out well.

If you live in Boulder and haven’t checked this place out, GO NOW!  You are missing out more than you know.

Thank you  to the amazing Jason and Hayley for introducing us to this place!

You can follow Ripple at @rippleyogurt and or on Facebook!

Hey everyone!  Sorry it has been so long since I have written  – life has has held me hostage.  However, on the brights side Drew and I made a great meal last Sunday and here I am to share it with you! Drew has been studying non stop for his CPA exam lately, so we wanted to make a meal that was nice and fast, but packed with flavor.  We decided to go with pesto, it took less than ten minutes to make.

Traditionally pesto is made with pine nuts, but holy cow are they expensive!  I went to the store and they were $23 a pound, so no Pine Nuts for us, but almonds served as the perfect substitute.  I have recently started making changes in my diet in order to make healthier, more informed decisions about the food I put in my body, and eating less meat is one of those changes.  Almonds were a great way to replace chicken while still keeping a great source of protein in the dish, plus they gave the pesto a hint of sweetness with the spiciness of the basil.

This pesto was so great, and made for fantastic leftovers the next day!  Want the recipe?  You don’t even have to ask…

1/2 cup of skinless almonds, slivered

1/2 cup of freshly grated parmasean cheese

1/3 cup of extra virgin olive oil

2 garlic gloves

1-2 cups of fresh basil

salt and pepper

Toast the almonds for about a minute, but make sure not to burn them.  After that, put them in a food processor and pulse it to chop them up a bit before adding the rest of the ingredients.  Afterwards add the olive oil, garlic and basil.  I would suggest adding a little less basil at first and then adding more until you reach your desired level.  Blend until smooth put in another bowl and add the parmesan, salt, and pepper to taste.  Add to pasta and serve up!

Make sure to keep the extras, they will be fantastic left overs – I know those are always my favorites.

I personally don’t run into the kitchen when I hear there are mushrooms cooking, but this recipe has great flavors and it is worth sharing.

Ingredients:

– 1 lb of mushrooms of your choice (morel, white button, shiitake, etc.)

– 1/2 stick of butter

– 3 to 5 cloves of garlic (this depends on how close you want people to stand to you later in the day)

– Salt and pepper, to taste

– 2 tbs, dry white wine

– 1/3 cup of pine nuts (almonds will also be a great alternative)

– 1 – 2 tbs chopped chives or flat-leaf parsley

Pre heat the oven t0 450 degrees F and while waiting start putting the rest of the ingredients together.  When cleaning the mushrooms just take a wet paper towel and wipe them down, you do this because mushrooms will retain the water you use to wash them.  If you like you can also cut the mushrooms in half and spread them across the pan.  Cut up the garlic to the desired size sprinkle in the pan, and then add salt and pepper.  After you can cut up the butter and place on top of the mushrooms then just mix all together – your hands are fine.  After this, sprinkle the wine on top of the mushrooms.

You will put the mushrooms in the oven for about 15 minutes, they will start to sizzle.  After taking them out of the oven toss the nuts on top and then put them back in the oven for about 10 minutes.  The amount of time will change depending on the type of mushrooms you use.

Hope you enjoy.


Yesterday was the last day of winter and Drew and I decided to make a dinner to welcome springtime. The best parts of spring are the flavors that come with the season.  For Sunday dinner Drew and I decided to harnessed these fresh flavors in a delicious salad.

Ingredients:

– Lettuce of your choice

– Chicken (we seasoned with a garlic and herb rub)

– Shaved, toasted almonds

– One ear of corn, grilled

– Goat cheese (you could also use Feta cheese, but I prefer goat, because it has a light creamy quality)

– Avocado

– White Balsamic Vinaigrette (If you have a little extra time I would suggest a bacon vinaigrette to top off the salad, yummy!)

The salad was amazing and far superior to the SmashBurger we had yesterday; Drew and I have been regretting that decision for two days now… I am sure you can imagine.  I am so excited to see what veggies and flavors make their way into our springtime cooking this season.

Enjoy.

There are some days when I get in the mood to cook, to try something new.  Friday night I had this “great” idea to make gnocchi (potato dumplings) for dinner.  Drew is studying for the CPA exam, and I thought it would be a nice treat to make a homemade meal for him.  Four hours later it wasn’t such a “great” idea…

Normally when making gnocchi you boil the potatoes and pass them through a vegetable mill, creating veggie spaghetti noodles if you will, but I didn’t have one.  This is pretty much where I should have turned back or bought a dang vegetable mill, but no.  Drew suggested we use a meat tenderizer to pound out the potatoes.  Yes, you can start laughing here.  Well a few minutes later potatoes are done and pealed and here I am unsuccessfully trying to pound out potatoes.  This was a terrible idea, some of the potatoes were mushed to oblivion and others were just chunks.  Getting even more frustrated because I am not even 1/8th the way through 3lbs of potatoes I think it just might work to use a citrus juicer to “squeeze” the potatoes out.  For your enjoyment I included a link so you can visualize the impending failure and mess that is on its way.  As you guessed, the juicer sure didn’t work… finally Drew comes out for a study break and I decide to ask if he has a cheese grater.  Thank God he did, the grader was working wonders for a while until… I managed to shave a chunk of my knuckle off.  Awesome, blood everywhere and no Band-Aids in the house.

This mess was building on one side of the kitchen while on the other I was making bacon and trying to roll out dough.  Imagine an entire 2 ft x 2 ft area covered in flour, potatoes, bacon and looking nothing like dough.  Below is the well I made of potatoes to mix in the egg.  This was the onset of another mess…

Eventually I am covered in mushy potatoes and trying to make actual dough.  Because I was not able to smash/squeeze/shred the potatoes into consistent parts the dough ended up being smooth/lumpy and an overall mess.  I managed to get flour all over the counter, the floor and me.

I eventually managed to make actual dumplings and got them into the water to cook.  While this disaster was happening I did make a great homemade Alfredo sauce.  In the end I was able to make two batches of the gnocchi, but not restaurant quality by any means.

Once I called Drew out for dinner I was laughing, on the verge of tears and begging him not to go into the kitchen.  The mess was terrifying. Drew ate it, whether or not he actually liked it I’m not sure.  By the time I got to actually cleaning the kitchen I was drinking wine straight out of the bottle.  Don’t judge, I know you all have done it at least once, and in my defense I already had enough dishes to clean.

Overall I made it through, but not without my fair share of battle wounds and frustrations.  It may be another 10 years before I brave this recipe, but from one amateur chef to another… don’t try this at home.

Now that spring is just around the corner I thought I would share some awesome cocktails for you all to enjoy.  I saw these today on Real Simple and I wanted to get in the kitchen and start whipping them up right away.

Cosmo Slushy

Ingredients

  • 10 ounce (1 1/4 cups) citrus-flavored vodka
  • 1/2 cup Rose’s lime juice
  • 2 cups cranberry juice
  • 4 ice cube trays

Directions

  1. Combine vodka, lime juice, and cranberry juice in a pitcher with 2 cups water and stir to blend. Divide between ice cube trays and freeze at least 4 hours or overnight (the drink cubes will freeze only partially).
  2. Just before serving, empty trays into a large bowl and using a fork, break up cubes to loosen ice crystals (the ice will be slushlike). Spoon slush into tall stemmed glasses and serve immediately.

Lime Sorbet Margaritas

Ingredients

Directions

  1. Rub the lime wedges around the rims of 8 stemmed glasses. Place the sugar on a small plate. Turn each glass upside down and dip the rims in the sugar to coat.
  2. Place 2 scoops of sorbet in each glass and pour 1 tablespoon of tequila over the top of each. Serve with a spoon.

Pear Mimosas

Ingredients

Directions

  1. For each serving, pour 3/4 cup of Champagne (or ginger ale) into a flute or wineglass and top with 1/2 cup of pear nectar. Squeeze and drop in 1 wedge of lime.

White Sangria

Ingredients

Directions

  1. In a large pitcher or other container, combine the wine and sugar. Stir until the sugar dissolves. Add the remaining ingredients, excluding the club soda, and mix well.
  2. Place the pitcher in the refrigerator and let the sangria sit for at least 1 hour (and up to 4 hours). The sangria will sweeten with time, so the longer it sits, the better.
  3. Just before serving, stir in the club soda and ice cubes.


Drink up and enjoy!


I recently went to Sonoma for a weekend with my AMAZING Nana (grandma) for a girls weekend and to celebrate my birthday, and let me say if you enjoy wine you have to find yourself tasting the day away at Jordan.  Our first stop on day number two was at Jordan Estates – this was the most breath taking Estate I had ever visited.

Our visit to the Estate started with a tour of the property to look out along the endless rolling hills covered in vines.  It was beautiful, I didn’t ever want to leave.  I wouldn’t mind plopping myself down on a chair and watching the seasons change right from that very spot.

After getting the opportunity to see the property we went inside for the first tasting of the afternoon, a 2008 Chardonnay, Russian River Valley.  This Chardonnay was fantastic and when paired with the Hamachi Sashimi and Black Caviar with Daikon Radishes the wine really came to life.  The wine by itself was delicious, perfectly light with a crisp scent of apple and pear, exactly what I want from a Chardonnay.

The barrel room was attached to the first tasting room and was amazing in it grander.  Once walking into the room you are seduced by a delicious smell of oak… a blend of French and American oak.  Traditionally the barrels will last for about 5 years before they become neutral, but Jordan Estates only uses theirs for two to three years.  Only the best!

After we spend some time in the barrel room we went back into the main portion of the Estate for our second pairing in the library.  The pairing was of a 2000 Cabernet Sauvignon, Alexander Valley and New Zealand Venison on a rye tostini with an aioli sauce.  I would not mind dedicating an entire afternoon to tasting and paring these two things together over and over.


After this we discover there is a “secret room” connected to the library where are able to enjoy two more fantastic Cabernet Sauvignon’s.  The first, and my favorite, was the 2003 Cabernet Sauvignon, Alexander Valley.  It was well-balanced and beautifully paired with a plate of cheeses.  We had a trio of cheeses, the first being a Mt. Tam Triple Cream (great in a dried fruit tostini), then a Loma Alta “Black Mountain” Swiss style cheese and a Flagship Reserve Truckle Swiss Cheese.  This was a beautiful mix of cheeses that also paired wonderfully with the last wine, a 2006 Cabernet Sauvignon, Alexander Valley.  Being able to taste the three different years and experience how the wines changed over time was a treat.  Wine has a fantastic way of changing and growing over time.


My visit to Jordan Estate was amazing, I felt like I was visiting a French Chateau without the jet lag.  The Estate really was a magical place and the wine and food pairings made it become something else entirely.  I left with a great bottle of the 2003 Cabernet Sauvignon and Perfect Pairings, a cookbook by Evan Goldstein to continue enjoying what I love so much, food and wine.

I would also like to thank my amazing tour guide, Pete, it was a pleasure exploring the Estate and discovering Jordan wines with you.  I can not wait to visit again and treat myself to all the beauty that is Jordan Estate.  Thank you!

This has quickly become one of my favorite items to make, so easy and this week it was the best way to get rid of all my extra food I hadn’t eaten during the week.  Making food for yourself usually means a few items are left over towards the end of the week, in my case it was just enough eggs, bacon, and a green pepper.  By the way, I made sauteed bacon and brussels sprouts last week with a chicken, herb and cheddar sausage, GREAT!  All you need for quiche:

– 5 eggs

– 1 cup milk

– 1 cup cheese

– Pie crust

This is the basics, after this you can go hog wild and add whatever you like.  Others that I have tried are onion and broccoli, green chillies and cheddar, as well as a three cheese.  You have limitless possibilities in terms of adding what you like.  FYI in case you ever wonder what a frittata is, it is an Italian version without the crust.

Bon appétit.


PS.  Sorry I have not posted in a while, I was in San Francisco for business and then went to Sonoma for some R and R and of course some wine… so look out for winery and restaurant reviews from Sonoma!

Chicken pot, chicken pot, chicken pot pie as Drew likes to refer to it every time we eat it!  Two weeks ago the meal of choice was chicken pot pie, however, we put our own spin on the recipe.  Instead of going for the pie crust, pie pan, fancy crust edges, we decided to go with biscuits.

I’ll be honest this wasn’t the most successful recipe to date, but it was a great recipe to learn and know what to do for the future.  We decided to pick out a few veggies: celery, corn, green beans, carrots, and broccoli.  You can pick anything you like, this is the benefit of making your own.  I don’t like peas, so peas were a no go where normally they are always in chicken pot pie.  This is also where we first went wrong – we decided to blanch some of the veggies where we should of instead sauteed or boiled a few to make them softer before cooking the pot pie.  Some of the veggies came out a bit crunchy.

The sauce that we mixed chicken and veggies in with was quite simple – 1 cup chicken broth and 1 can of cream of chicken broth.  Real easy and all you needed to add was a little pepper, the amount can be decided depending on how much of a kick you would like.

After mixing all the veggies and sauce we layered biscuits on top, however, we decided next time it would be best to cook the biscuits separately.  By layering the biscuits on top it was cause for the underside of the biscuits to not cook fully.

The dish over all was great, even with a few flaws, but it also provided a challenge for us to learn for future dishes.  Its chances like this where simple things can make a big differences.  Once perfecting the small things we can move on to bigger dishes.

Chicken pot pie was a great little dish from home as well as a learning lesson.

Bon appétit!

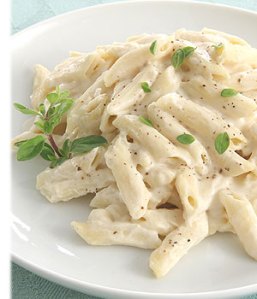
Per request from a friend I have an extremely fast and delicious Alfredo sauce recipe.  I am going to warn you that the recipe is not for anyone who is calorie counting or watching their weight, but if you are, this recipe is a good excuse to stop!

Alfredo Sauce 

– 1/2 stick of butter

– 1 1/2 cup of heavy cream

– 1 – 1 1/2 cup of Ramano cheese

Wait for the butter and heavy cream to come to a boil and slowly add Romano cheese.

This is one of the most simple and delicious Alfredo sauces I have had.  The heavy cream and butter provide the perfect thickness to the sauce.  I would also suggest steaming asparagus and cutting into your desired size and adding it to the sauce.  This will add the perfect amount of crunch to the sauce.

Tip: When it comes to boiling water for noodles, don’t oil the water, instead you should heavily salt the water.